Showing posts with label painting. Show all posts

Tuesday, May 31, 2011

Spring Session 2011- Week Eight

Swimming the Sea Watercolors and Foil Fish

Since May is Asian Pacific American Heritage Month we thought we would give a nod to that culture by doing a project that dealt with the ocean, fish, and watercolors. This is a great project to do for the texture alone. It creates beautiful and to some extent random textures on your watercolor painting. Once you paint your picture and it is still wet sprinkle some salt on it and the result is magical and amazing. You just need to let it dry first and then wipe away all of the salt to reveal the beauty it has left behind. We used this technique only on the ocean/water part of the painting to imitate waves and those great white-caps that you see in water and the ocean. We then had them do the sky whatever color they wanted, and however they viewed the sky to be. Some did sunsets, some did blue skies, and some created wonderful patterns for the sky. We then had the children cut out their water/waves and glue them onto their sky. The next part of the project was to create the fish out of foil. We did a rubbing technique for create fish scales on the foil. We used old netting from fruit and candy and taped it onto some cardboard then placed a piece of foil over it. The children then rubbed with the backs of their finger nails to emboss the foil with the "scale" pattern for the fish. We used sharpies to draw over fish over the scales and it create a pretty convincing fish. In one class we had a little extra time this week, so we played some bingo in the last few minutes. A great way to pass some time and keep the kids focused.


Sunday, January 9, 2011

Winter Session Week Eight

Mardi Gras- Jumping Jacks & Splatter Friends

Break out the crowns, beads, gawdy costumes, and king cakes Fat Tuesday is here!! So our projects for this inspiration is all based on the craziness, colorfulness, dancing, and myths that surround Mardi Gras.

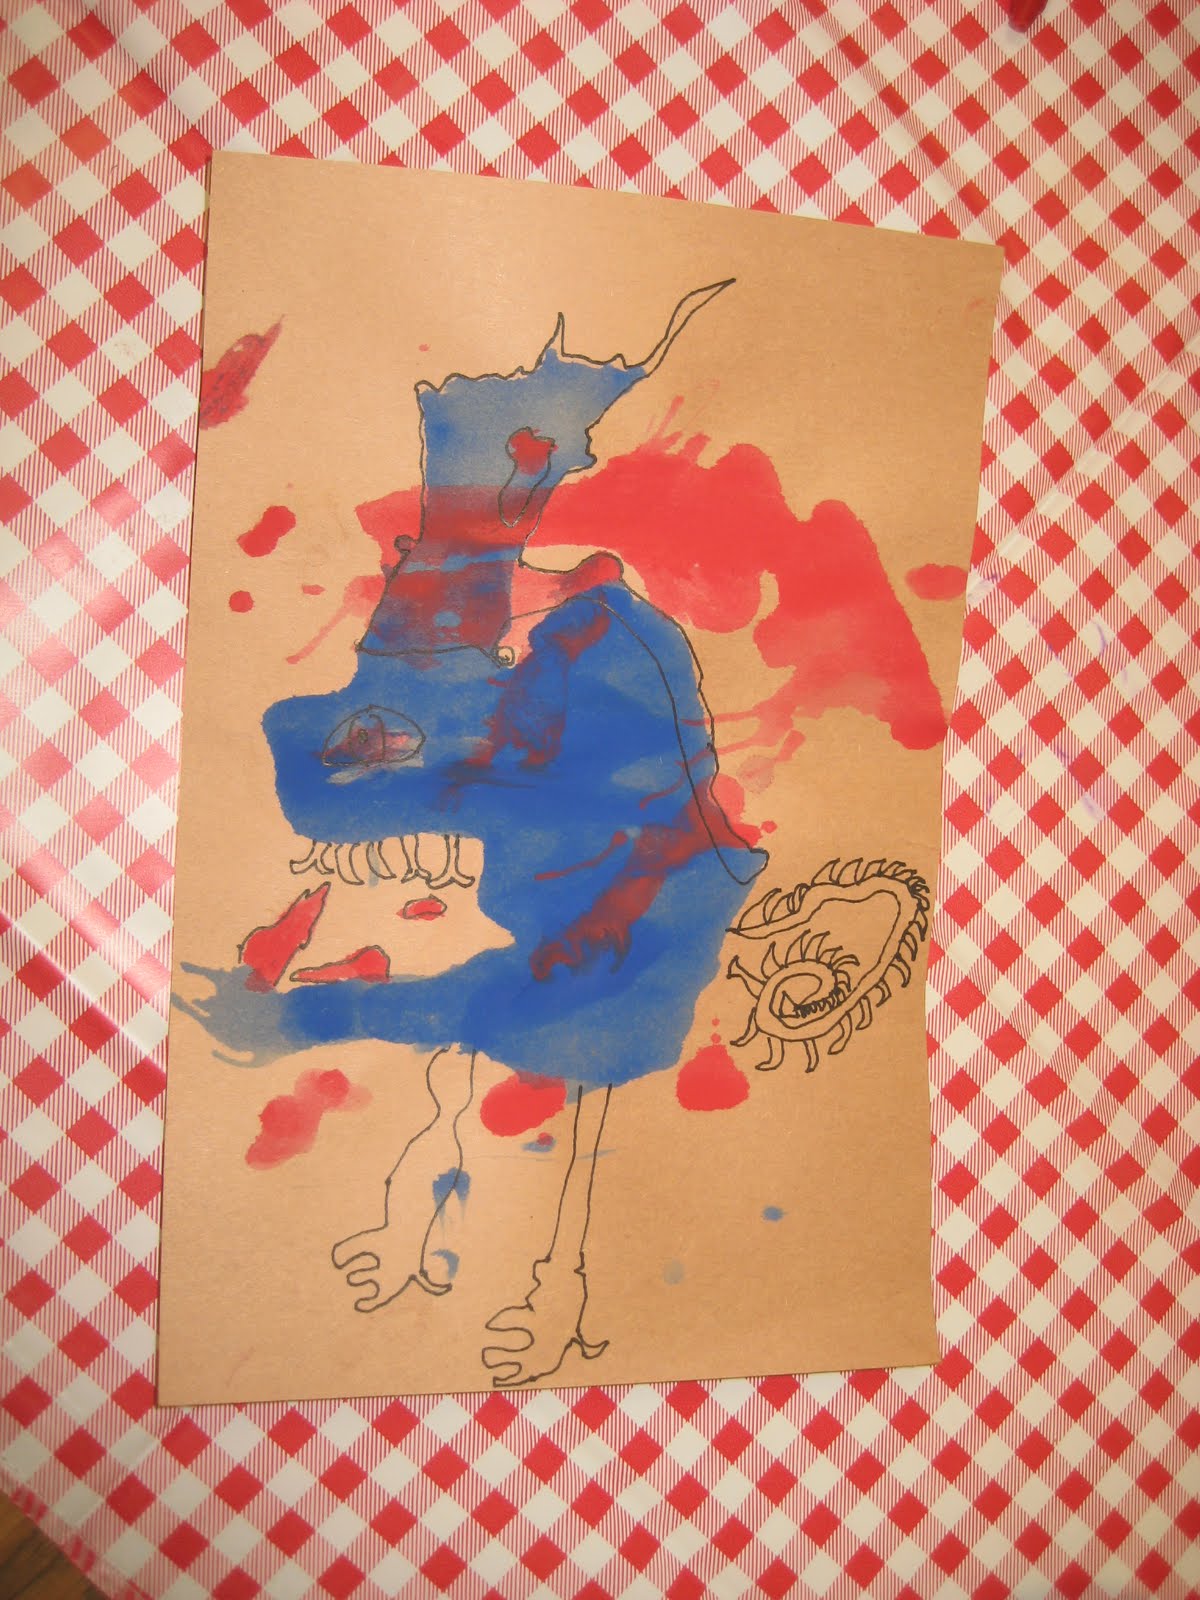
Our first projects is what we like to call Splatter Friends. We had the kids pick two colors of paint and they applied it to the paper by blowing the paint around on the paper with a straw. This created a random, mysterious, organic shape. After the paint dried we had the children draw with a black marker or pen using the shape created by the paint some sort of animal, creature, fairy or monster. I love these sort of projects because it allows the kids to be super imaginative, and push their creativity. Not to mention so completely abstract which is so cool.


Jumping Jacks/Pantins

I love these crazy characters. They can dance like nobody's business. These fun toys are called jumping jacks, in French it's a pantin. I was originally trying to find a different type of toy, but still the same idea of self created movement. These characters reminded me of the fanciful nature of Mardi Gras. The kids picked out the pantin they wanted to create and cut out all of the parts. We them had them put together all of the joints with brads, and then we helped them tie all of the strings to make their jumping jack go crazy. These are super fun, and with the basic structure anyone could create there own jumping jacks. I suggested to some kids that they may want to create their own at home, and a robot could be a natural pantin.


Sunday, January 2, 2011

Fall 2010 Session Summary

My blog posts have been lacking to say the least. I've finally got around to rounding up some photos from the fall session that were just waiting to be posted. We did such a variety of projects towards the end, and instead of trying to categorize everything by week, I'm putting up a mega post of everything so you can see what we were up to. We worked on blending acrylic paint colors, cartoon sketching, paper crafts, clay, and so much more. Here is a quick run down, in pictures, of what we did in class.


Tuesday, October 5, 2010

Impressionist Pointillism with Analogous Color

Now that's quite a title. We did in fact go over just that with the kids today. I really love impressionism and the colors are beautiful. Though impressionist artists used such a different approach to creating color shifts, shades, and subtlety. Their technique at the time was shockingly unique. Many artists didn't try to hide their brush stroke, but instead adored it and highlighted it. One of the techniques they used was called pointillism, and at the time the term was used to describe their work in a negative connotation, but today all of that has subsided. How they used color was significant too, and so we discussed the basics of the color wheel with the class today. We talked about primary colors, a little bit about secondary colors, and glazed over tertiary color. Our main focus was on analogous color. Analogous colors are those colors that sit next to each other on the color wheel, such as, yellow, orange, and red. Green, blue, and purple are also analogous colors. The children picked three analogous colors to paint their canvas using the pointillism technique. We gave them special round sponge brushes to create the dotted technique, and encouraging them to fill the entire canvas while still being able to see all three colors. It was a small challenge since it is a departure from the traditional way to use a brush. The kids did a wonderful job filling in their canvas with their analogous colors. We topped it with a monogram. They had to cut out their letter glue it down, and fill the letter with buttons. It was a great exercise in scissor skills, gluing, and planning with buttons of all sizes. Some were creative and began stacking some of their buttons to create more relief to their "painting".


This week we also brought some clay for the children to play with if they finished their project early. I also told them if they created something I would take a picture of it for them and post it to the blog so here are some of the sculptures they created out of clay. It was a great day!


Autumn Trees and Bird Ornaments

Hot enough today? I think it was more like a sweltering, sweaty, mess. Much thanks to the custodian that came in to save the day and turned on the air-conditioner for our class!! I think that was much like the day trying to re-focus, since the heat keep most of us in a haze. Okay now re-focus on what the projects were for today. Fall has finally arrived officially, even though it seems as though summer has just started, we worked on a autumn tree watercolor project. The children using yellow, orange, and red tempera paints created a textured background. The idea was to sponge paint the background in autumn leaf colors. We encouraged the kids to let all colors show and use a little blending. Some enjoyed blending so much the background turned into a solid color, nonetheless, a beautiful autumn color. After the background dried we used a straw and black tempera paint to create the trunk and branches of the tree by blowing the paint onto the paper. The results turned out really interesting. Some kids ended up with large, thick trunks and tons of branches, and others with smaller trunks and few branches. The black tempera did need a little help, and some kids were more timid with blowing the paint around, but eventually they got it.

We also worked on a small sewing project, of a felt bird ornament. Using felt, a couple beads, and ribbon the kids were able to turn simple shapes into a super cute ornament. It was a good exercise in coordination having to thread ribbon and beads, and tying knots.

Monday, July 26, 2010

Nature Lover Day Three

Last day of our summer camp crafty craziness. Starting the day with a colored pencil finale. We created many large bouquets of flowers the children could draw from. They practiced drawing with paper and then we gave them a special card that they could draw their own botanical drawing on, and then give to someone special.


Terrariums, terrariums, terrariums, everywhere. This was incredibly fun project. I enjoyed making my example one many weeks before. This is certainly a project for all ages. We tag teamed this project with our pet rocks to put into the terrarium. The kids were able to paint a rock and while that was drying they made up their terrarium. They first filled the bottom with rocks for drainage, and then dirt and 2 or 3 plants into their terrarium. We gave them each a little frog or lizard to place into the terrarium as well (plastic of course).


To end the day and the summer session we created wiggly worm ranches with the children. We love the idea of taking something and turning it into a dessert somehow. So we thought the wiggly worm ranch would make a perfect dessert. I guess this might seem a bit unusual, but to me it screams chocolate, chocolate, and more chocolate. We first had the kids make a sign for their worm ranch to make it appear official. We then had them do layers of chocolate pudding, and crumbled chocolate cookies. Then on top they put candy rocks and a gummie earthworm. They looked great, and I loved, let me rephrase that, LOVED it. Though to my dismay some of the kids, shockingly, didn't like them so much. I think because the pudding was a super dark chocolate that I made, as well as the cookies that were homemade. It was a chocolate lovers dream, if you ask me, but if I had to do it again for kids I would lighten up on the chocolate, and probably get an easy mix. Partner that with some chocolate wafer cookies. I think that would be more child friendly. Still yummy either way. Next summer we'll know better. That's it folks, next up fall after school craft kitchen!