Friday, April 29, 2011

Spring Session 2011- Week Four

Marc Chagall & Dream Clouds

Dreams are wonderful, scary, frightening, beautiful, ethereal, ghostly, colorful, honest, unrealistic, realistic, and so completely creative. Taking inspiration from the artist this week, Marc Chagall. His painting truly capture dreams and dreamlike qualities. We introduced the kids to Marc Chagall's paintings this week looking at his use of color and subjects in his paintings. Here is a brief background on Mr. Chagall that we shared with the children.

Marc Chagall was born in Vitebsk, Belorussia, Russian Empire [now in Belarus] in 1887 - the oldest of nine children. His father worked in a herring factory and his mother sold spices and herring out of a small shop in their home. As a child he studied drawing and painting and in 1910 he went to Paris and became an artist. Chagall often painted dreamlike scenes and many of the pictures he painted include memories from his childhood. In addition to paintings, Marc created stage sets, stained glass, murals and costumes, as well as illustrations for children's' books. Written by Andrea Mulder-Slater, KinderArt®

Marc Chagall's "I and The Village" painting was our source of inspiration this week. They started out by sketching an "X" across the entire sheet of paper. The children next were to draw a profile of a person on one side, and a profile of an animal/creature on the opposite side. In the corresponding areas the kids were to draw something the person dreams about, and in the last section something the animal dreams about. We had them use crayons this time for the assignment and encouraged them to fill in the entire "canvas". We tried to keep our "guidelines" to a minimum so they could really create their own dreamlike picture. Once they were finished we helped them mount their creation on solid color paper, and had them title, date, and sign their artwork.


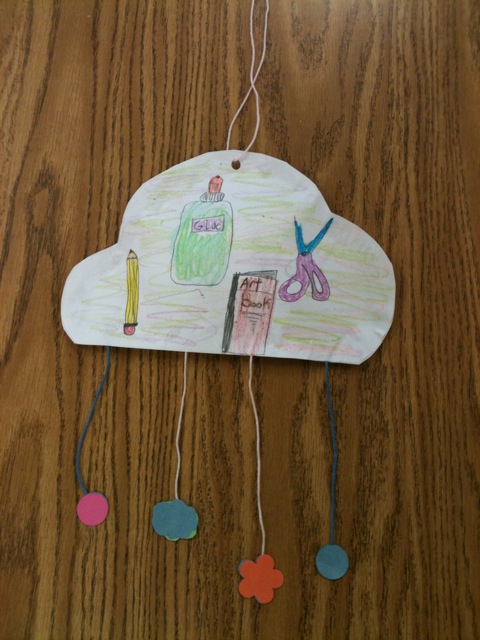
Our second project was a dream cloud created out of paper, cotton balls, and yarn. To use as a mobile to hang in their rooms. We had some punches available to use, but we also let children create their own images that would hang down off of their dream cloud. They turned out really cute.


Friday, April 15, 2011

Spring Session 2011- Week Three

It's Easter Week! No-Bake Strawberry Cheesecake and Deviled Eggs

Easter week and we are inspired by things that we eat at Easter time, cheesecake and deviled eggs. Although I don't eat them much, I do love yummy deviled eggs. The name has given me moments of pause and wonder, but it soon passes as I pop 'em in my mouth, and then it all makes sense, devilishly good. To my surprise some children have never had deviled eggs, and some kids plain just don't like eggs, and then there are the fanatics that love them. We talked about all of the ingredients, and what it added to the flavor of the filling, and let all of the kids contribute an ingredient or two or three. We mixed it all up and let them fill their own eggs, and sprinkle some paprika on top. Here is the basic recipe that I use and these are estimates I don't follow any measurements just my taste buds tell me when its done.

Deviled Eggs (for 1 dozen hard boiled eggs)

1/4-1/3 c. mayo (any kind that you like)
1 T. mustard (dijon is always good, but whatever you have around)
1 t. salt
1/2-3/4 t. pepper
1-2 T. pickle juice (I like bread and butter pickle juice myself gives it a tangy hit)
Paprika for sprinkling

Slice eggs in half and place hard yolks in medium bowl and hard whites reserve for later on platter. Using a fork break up yolks to resemble bread crumbs/peas. Add mayo, mustard, salt, pepper, and pickle juice. Mix together until combined. Using a spoon or small ice cream scoop (my favorite) scoop filling back into each egg half. Sprinkle with paprika and voila! I would add the smaller amount of ingredients and slowly add until it is to your liking. I don't like too much mayo so mine might be on the drier side. If you like yours creamier add more mayo. A couple things you could do to change it up is chop up fresh oregano about 1 tsp. or more. You could also add lemon juice into the mix. A bit of smoked salmon would be super yummy. If you aren't a fan of paprika chopped chives add a nice bite and beautiful color.

Our other favorite Easter treat is No-Bake Strawberry Cheesecake. This was a shoe in for most kids. Strawberries were an easy sell, but the for some the cream cheese not so much. I think as a kid it is hard to imagine a cheese being a sweet treat, but boy does it taste delicious as a dessert. We search high and low for a no-bake recipe and tested a few replacing part of the cream cheese with yogurt and sour cream. We ended up keeping it simple and used the recipe on the back of the Knox gelatin box. Again, we discuss with the kids what the ingredients are and what purpose they have in the recipe, and let them put it all together with our assistance. Here's the recipe for the cheesecake and the homemade crust:

Knox Gelatin recipe with small alteration:

6-8 strawberries
1 env. Knox unflavored gelatin
1/3 c. sugar
1 c. boiling water
2 pkg. (8 oz.) cream cheese, softened
1 tsp. vanilla extract

Eileen's Incredible Crumb Crust

1 cup Mesa Sunrise Cereal crushed fine, or finely ground in food processor
2/3 cup sliced almonds, lightly toasted, cooled and finely ground in food processor
1/3 cup organic brown sugar
1/8 tsp. sea salt, finely ground
1/4 tsp. each cinnamon and freshly grated nutmeg (optional)
4 T. organic butter, melted and cooled

Combine all dry ingredients in a bowl, mixing well. Add melted butter and stir until incorporated.
Press crumb crust into bottom of 10" pie plate, or into a 12 well muffin tin, lined with paper cupcake liners, if making mini cheesecakes.

Line a muffin tin with 12 cupcake liners. Hull strawberries and chop them into quarters. Place strawberries into food processor and pulse about three times to give strawberries a rough chop. Set aside. In large bowl mix gelatin with sugar. Add boiling water and stir until gelatin is dissolved. With electric mixer beat in the cream cheese and vanilla extract until smooth. Pour into graham cracker crust. Chill until firm about 2-3 hrs.

In between cooking projects we had a simple paper basket that the kids were able to put together, and below are photos from the week. Enjoy!


Thursday, April 7, 2011

Spring Session 2011 Week Two

Learning about ATC cards & Felt character pins

Nowadays we have all sorts of "baseball cards". When I was young I remember collecting Charlie's Angels cards, Star Wars cards, and Wacky Packages stickers. The great thing that artists now are creating are ATC cards (Artist Trading Cards). These cards are created by using typically mixed media. This week we talked to the children about what mixed media are, and how they are incorporated into ATC cards. ATC cards were basically created by an artist from Switzerland named Stirneman. In 1996 he wanted to create a catalogue for work he was doing with some other artists. Due to the high cost of printing what he called hockey cards, he decided to create them himself to a tune of 1,200. After he made all of them in 1997 he put them on exhibit, and when it was open to the public he encouraged those who came to create their own. So, ATC cards are the same dimension as baseball cards so you can fit them into typical baseball card sleeves for protection. ATC cards also are only traded or exchanged not sold. Though nowadays people do sell them though they are considered ACEO (Art cards, editions, and originals) cards.


With the remainder of our time we had the kids make felt character pins. We created a few templates for the kids, but encouraged them also to create their own if they wanted to. These we super fun to make and putting googly eyes on them made them extra cute/funny.


Tuesday, April 5, 2011

Spring Session 2011- Week One

Building Castles- Paul Klee inspiration

Our first week of spring class and we also wanted to start with some art basics. Paul Klee provides such a great opportunity to see how basic shapes can create beautiful artwork. We started the class with discussing a bit about Paul Klee as an artist, and showed the kids some slides of his work and what the project was inspired by. A brief background on Paul Klee from wikipedia- (1879 –1940) was born in Switzerland, and is considered both a Swiss and a German painter. His highly individual style was influenced by movements in art that included expressionism, cubism, and surrealism. He taught at the German Bauhaus school of art, design and architecture. His works reflect his dry humour and his sometimes childlike perspective, his personal moods and beliefs, and his musicality. Below are some examples of Paul Klee's work that we showed the children and talked about similarities, what colors were used, and what they saw in it.


Here are some of the beautiful artwork the children created inspired by Paul Klee using basic shapes, oil pastels, and colored pencils.


We also made these Paul Klee inspired min magnets that they drew onto painted wooden discs.