Showing posts with label food craft. Show all posts

Tuesday, May 31, 2011

Spring Session 2011- Week Seven

Let's Make Pasta Salad!

Now pretty much everytime I see or hear the word salad that Wiggles tune goes off in my head...fruit salad yummy yummy. Is it possible to delete that tune from my brain somehow by using the delete key. Oh one can dream. It is too bad though since I do enjoy a good salad be it fruit, green, or pasta. Trying to get my kids to eat veggies isn't horrible, they do okay, but as I say it can improve. So, since so many kids seem to LOVE pasta, we thought we might try to sneak some veggies in by making a pasta salad with them this week. So we brought along many different veggies to add to their pasta salad, and we gave them the choice of two different dressings. We made both dressings in class. First, we made the pesto dressing and we had all of the kids help make it by adding all of the different ingredients. Our pesto dressing included basil, spinach, parsley, olive oil, salt, pepper, lemon, and garlic. I brought along my food processor to mix all of the yummy ingredients up. We didn't add any nuts or cheese to the dressing because we wanted to be more like a dressing rather than a sauce. Plus, they had the choice to add some Parmesan to their pasta salad during the mix up if they wanted too. The second dressing we made was the balsamic vinaigrette dressing. We used olive oil, balsamic vinegar, salt, pepper, garlic, lemon, and some mustard. I hand whisked this dressing all together. After we made both dressings we let the kids taste test most of the veggies with each dressing. We had a whole buffet of veggies in the offering. Cauliflower, Cheddar Cauliflower, broccoli, zucchini, carrots, purple onion, mozzarella cheese, Parmesan cheese, tomatoes, celery, and olives. Most kids did a great job creating a nice pasta salad with a decent amount of veggies in it.

We also had the kids draw their own placemat pal. We sewed up a bunch of placemats with a small pocket on them that the kids could then draw their own pal on using fabric markers. They can use the pocket to put their utensils and napkin in when they set the table (wink, wink).


Friday, April 15, 2011

Spring Session 2011- Week Three

It's Easter Week! No-Bake Strawberry Cheesecake and Deviled Eggs

Easter week and we are inspired by things that we eat at Easter time, cheesecake and deviled eggs. Although I don't eat them much, I do love yummy deviled eggs. The name has given me moments of pause and wonder, but it soon passes as I pop 'em in my mouth, and then it all makes sense, devilishly good. To my surprise some children have never had deviled eggs, and some kids plain just don't like eggs, and then there are the fanatics that love them. We talked about all of the ingredients, and what it added to the flavor of the filling, and let all of the kids contribute an ingredient or two or three. We mixed it all up and let them fill their own eggs, and sprinkle some paprika on top. Here is the basic recipe that I use and these are estimates I don't follow any measurements just my taste buds tell me when its done.

Deviled Eggs (for 1 dozen hard boiled eggs)

1/4-1/3 c. mayo (any kind that you like)
1 T. mustard (dijon is always good, but whatever you have around)
1 t. salt
1/2-3/4 t. pepper
1-2 T. pickle juice (I like bread and butter pickle juice myself gives it a tangy hit)
Paprika for sprinkling

Slice eggs in half and place hard yolks in medium bowl and hard whites reserve for later on platter. Using a fork break up yolks to resemble bread crumbs/peas. Add mayo, mustard, salt, pepper, and pickle juice. Mix together until combined. Using a spoon or small ice cream scoop (my favorite) scoop filling back into each egg half. Sprinkle with paprika and voila! I would add the smaller amount of ingredients and slowly add until it is to your liking. I don't like too much mayo so mine might be on the drier side. If you like yours creamier add more mayo. A couple things you could do to change it up is chop up fresh oregano about 1 tsp. or more. You could also add lemon juice into the mix. A bit of smoked salmon would be super yummy. If you aren't a fan of paprika chopped chives add a nice bite and beautiful color.

Our other favorite Easter treat is No-Bake Strawberry Cheesecake. This was a shoe in for most kids. Strawberries were an easy sell, but the for some the cream cheese not so much. I think as a kid it is hard to imagine a cheese being a sweet treat, but boy does it taste delicious as a dessert. We search high and low for a no-bake recipe and tested a few replacing part of the cream cheese with yogurt and sour cream. We ended up keeping it simple and used the recipe on the back of the Knox gelatin box. Again, we discuss with the kids what the ingredients are and what purpose they have in the recipe, and let them put it all together with our assistance. Here's the recipe for the cheesecake and the homemade crust:

Knox Gelatin recipe with small alteration:

6-8 strawberries
1 env. Knox unflavored gelatin
1/3 c. sugar
1 c. boiling water
2 pkg. (8 oz.) cream cheese, softened
1 tsp. vanilla extract

Eileen's Incredible Crumb Crust

1 cup Mesa Sunrise Cereal crushed fine, or finely ground in food processor
2/3 cup sliced almonds, lightly toasted, cooled and finely ground in food processor
1/3 cup organic brown sugar
1/8 tsp. sea salt, finely ground
1/4 tsp. each cinnamon and freshly grated nutmeg (optional)
4 T. organic butter, melted and cooled

Combine all dry ingredients in a bowl, mixing well. Add melted butter and stir until incorporated.
Press crumb crust into bottom of 10" pie plate, or into a 12 well muffin tin, lined with paper cupcake liners, if making mini cheesecakes.

Line a muffin tin with 12 cupcake liners. Hull strawberries and chop them into quarters. Place strawberries into food processor and pulse about three times to give strawberries a rough chop. Set aside. In large bowl mix gelatin with sugar. Add boiling water and stir until gelatin is dissolved. With electric mixer beat in the cream cheese and vanilla extract until smooth. Pour into graham cracker crust. Chill until firm about 2-3 hrs.

In between cooking projects we had a simple paper basket that the kids were able to put together, and below are photos from the week. Enjoy!


Sunday, July 11, 2010

County Fair Day Three

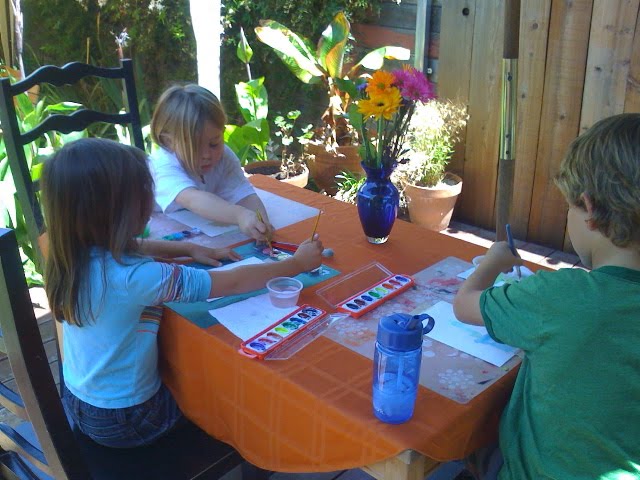
Last day of County Fair week, and I feel like we have almost been to the fair. We only needed a pig, chickens, and cow and it would have been complete. We ended this week doing watercolors of a bouquet of flowers. We did two different techniques with the watercolors still life. First, we had the children paint a wash on the background, and let it dry. While that was drying we moved on to floral painting number two, and it was supposed to be wet on wet, but the sunny day tended to dry out the paper rather quickly. The results still looked beautiful. The kids really had fun with this. Some attempted only a couple flowers and other the whole bouquet. I requested they try at least two. I was happily surprised with how detailed some got, and what color other were able to attain. Note to self, spend more money on quality watercolors. I bought some that I thought would last for a few weeks, but these doosies I bought only ended up making it through the three days barely. Thank goodness we had some better backups, my own beautiful kit I hoard, and some others that really helped round it out, and the children didn't at all mind sharing. Who can't love that?


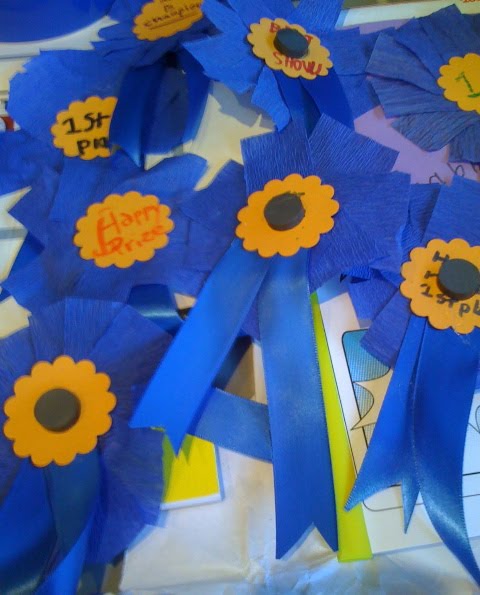
What's a trip to the fair without coming home with a blue ribbon? We couldn't let that happen to our little contenders. The only catch is they had to make their own. So we had them each make their own crepe paper blue ribbon that we glued magnets to the back of. This one below was one of my favorites I suppose I might be a little biased, but I love the saying.

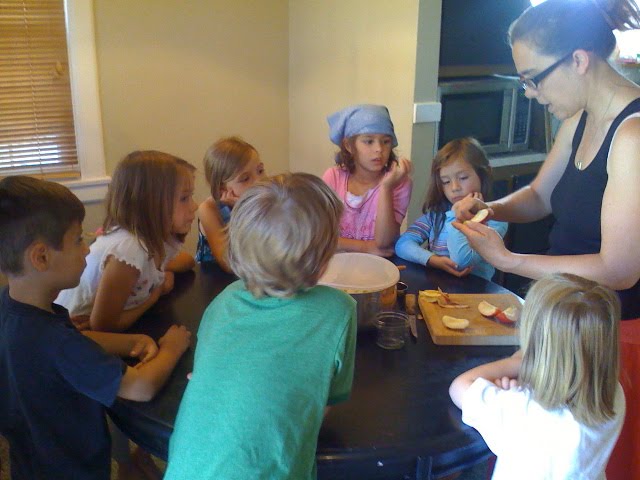
Next up, and most important project of the day was the apple pie in a jar! The kids couldn't wait for this one. Some were disappointed when they couldn't eat the pie dough and apples right away though. I told them they wouldn't be disappointed after it was baked in the oven. Yummy goodness. I pre-sliced and peeled all of the apples, but demonstrated with one more on how to peel and cut up an apple for pies. They got the chance to add sugar and cinnamon to the mixture and stir it. I then rolled out the pie dough, and each child was able to cut out a round for the bottom of their pie and place it in their jar. We then sent around the apple filling and they scooped up a cup of filling into their jar. I then rolled out the pie dough, and cut it into strips for the top lattice, and gave the kids each 6 strips to weave on top. They all did a fantastic job, and the pies turned out beautifully.

Lastly for the day we made bean bags for our bean bag toss game. Since the pie demonstration went a little longer than expected we had to rush through this project so we could get to the game, and all the kids could go home with their own bean bags, but we finished. Whew! They picked out fabric with solid backs and patterned fronts. They then went on to stamping their initials on the solid side so we wouldn't get the bean bags confused. Sewed up three sides and then the children filled their bags with a mix of beans, peas, and barley. Finally sewing up the closure, and done. We set up three buckets in the backyard put points on each bucket, and then the kids took turns throwing their bean bags into the buckets. It is actually really fun, and there was bean bags flying literally everywhere. They landed in the trees and on the roof (?) go figure. We sent each kid home with a folder filled with printouts of coloring sheets, mazes, dot to dot and word finds all based on the county fair, as well as, some little prizes from the bean bag toss game. All in all it was a super fun week filled with yummie treats and fun projects!