Monday, July 26, 2010

Nature Lover Day Three

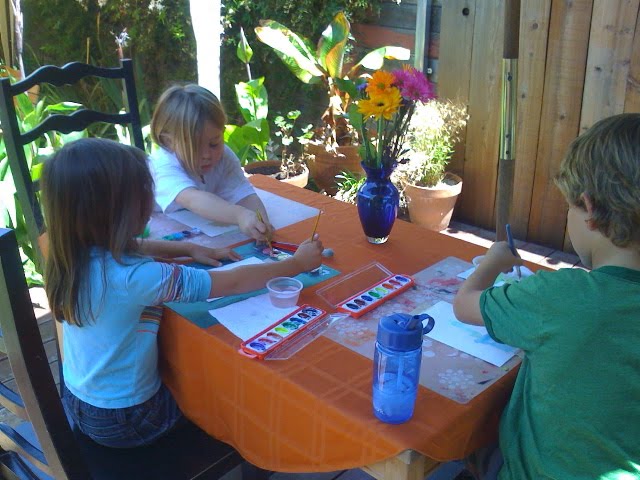
Last day of our summer camp crafty craziness. Starting the day with a colored pencil finale. We created many large bouquets of flowers the children could draw from. They practiced drawing with paper and then we gave them a special card that they could draw their own botanical drawing on, and then give to someone special.


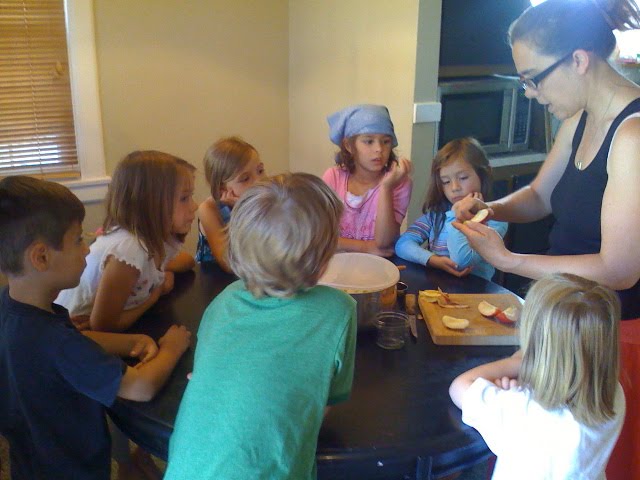
Terrariums, terrariums, terrariums, everywhere. This was incredibly fun project. I enjoyed making my example one many weeks before. This is certainly a project for all ages. We tag teamed this project with our pet rocks to put into the terrarium. The kids were able to paint a rock and while that was drying they made up their terrarium. They first filled the bottom with rocks for drainage, and then dirt and 2 or 3 plants into their terrarium. We gave them each a little frog or lizard to place into the terrarium as well (plastic of course).


To end the day and the summer session we created wiggly worm ranches with the children. We love the idea of taking something and turning it into a dessert somehow. So we thought the wiggly worm ranch would make a perfect dessert. I guess this might seem a bit unusual, but to me it screams chocolate, chocolate, and more chocolate. We first had the kids make a sign for their worm ranch to make it appear official. We then had them do layers of chocolate pudding, and crumbled chocolate cookies. Then on top they put candy rocks and a gummie earthworm. They looked great, and I loved, let me rephrase that, LOVED it. Though to my dismay some of the kids, shockingly, didn't like them so much. I think because the pudding was a super dark chocolate that I made, as well as the cookies that were homemade. It was a chocolate lovers dream, if you ask me, but if I had to do it again for kids I would lighten up on the chocolate, and probably get an easy mix. Partner that with some chocolate wafer cookies. I think that would be more child friendly. Still yummy either way. Next summer we'll know better. That's it folks, next up fall after school craft kitchen!


Nature Lover Day Two

One day down two to go. Today we worked with the children on blending with colored pencils and practiced on flowers. We went over primary and secondary colors, and how they can achieve those colors with blending colored pencils. Some of the drawings turned out quite amazing. It is interesting to see how children can be drawn to different mediums. Colored pencils are certainly more controlled and exacting. Last week with watercolors those children who like controlled mediums had to let go a bit. I think it is good to let them try all different kids of mediums because it challenges them to think differently about how to achieve what they want to produce. Below are some photos from our session.


Tweet, tweet, or these days I guess I should say chirp, chirp so web savvy people don't get too confused. Birds are all around and certainly in the east bay. We get so many birds that come into our backyard. Some even get brave enough to come into my kitchen. They quickly realize they are in the wrong place when our small dog Bento goes chasing after them. While researching projects for the summer we came across so many birdfeeders, and we really liked the idea, but we wanted to do something that didn't use plastic bottles. My partner in crime remembered doing them as a young girl with lemon rinds and nailing them to a tree. We really liked this idea, and since I have two orange trees we thought it was a perfect match and compostable. So we sliced the oranges in half, and had the kids scoop out all of the meat of the orange leaving the rind. All of the students then got to fill their "birdfeeder" with birdseed and peanut butter. Then we spot glued some string to hang the birder with. They turned out cute, and they attracted some other living friends as well, particularly a bug that looked like a ladybug but was green and black.


Our last project for the day was our posable frogs. This is one of those projects I was really looking forward to because I wanted to have them around the house. We gathered some really great fabrics for them to, and being a fabric fiend it was fun going through all of our fabric and creating groupings that would work really well together for the kids. The kids picked out two fabrics that they liked best, and traced to pattern piece onto the fabric. Promptly then utting out the pieces, and then we assisted the kids in sewing the two pieces together and helped them turn the frog inside out. We used buckwheat hulls to fill up these frogs. They picked out pony beads for the eyes and we sewed them on for them. Some of the children wanted to help sew them on which was a great help. I just love how they turned out.

Tuesday, July 13, 2010

Nature Lover Week Day One

Last week of Craft Kitchen, and I'm getting a bit teary eyed. Nature Lover week is on. This is the week we are focusing on colored pencils, and having a hand at botanical drawings. The kids seem to be doing well even on the first day. We started out with working on some of the techniques with colored pencils. Techniques such as light and dark lines, thin and thick lines, cross hatching, stippling, and smooth. I was amazed at how well the children were seeing what they were drawing. It seemed as though most of them were pleased with what they had done. I always tell them that if they are happy with their work/art then that is all anyone can ask. Typically we are all our own worst critique. Below I am sharing some of the artists that we get to work with this week.


Once we finished with our botanical drawings we moved on to our sun print totes. We pre-made the totes using ribbon for the handle and samples of pants/jeans that we just sewed closed at the bottom. They worked well for this project, and we always love being able to use interesting items that we can customize some how. So the kids first painted the tote with a foam brush and water. This just gets the fabric wet and allows the paint/dye to bleed and cover easily. After they "soaked" the fabric they picked out the leaves they wanted to use, and made sure they all fit onto their bag. Then they picked out which color they wanted to use between a turquoise and magenta color. After we mixed some paint up for them they then coated their tote with the paint, and then arranged the leaves onto their bags. Using some small rocks since it was a bit breezy we were able to hold down the leaves on their bags so they would leave an imprint. The bag stayed in the sun for about 30 minutes before we unveiled them. The children then took all of their leaves and rocks off to see how what sort of imprint was left from the sun. These particular paints are sun paints/dyes by Setacolor. There are a variety of colors that you can get them in, and I bought ours from Dharma Trading Co. located in San Rafael, CA. The totes turned out cute. They each have a pocket on the other side just like jeans would.


While the sun print totes dried we moved on to our leaf jar lanterns. We used tissue paper, leaves, foam brushes, and matte medium. The kids cut up some tissue paper, picked out leaves, and went to it. They first painted some matte medium on the jar, and then stuck the leaf to the painted area and then placed one piece of tissue paper on top of the leaf. Carefully they pressed down to get the paper to stick a little, and then painted more matter medium on to the tissue paper from the center of the piece out to one side then the other. They repeated that all the way around their lantern jars. When lit they look really nice, and have so many possibilities.


Last project for the day we made nature prints. It was a chance for the kids to do some pounding. We picked petals out of flowers that we had. I have some bougainvillea growing into our yard so we picked some of that to print with. The bougainvillea actually works extremely well because it is really thin and delicate yet not to juicy. They children arranged their petals and leaves on the paper, and then sandwiched them with another piece on top. We didn't have enough hammers for each child so they had to take turns using them. They did a great job sharing and using the hammers. The petals and leaves get pulverized, but leave behind the color from within, and can create some really interesting patterns, and beautiful color too. I think the kids liked pounding those hammers, if only I were to judge by how loud it got. Fun stuff.


Sunday, July 11, 2010

County Fair Day Three

Last day of County Fair week, and I feel like we have almost been to the fair. We only needed a pig, chickens, and cow and it would have been complete. We ended this week doing watercolors of a bouquet of flowers. We did two different techniques with the watercolors still life. First, we had the children paint a wash on the background, and let it dry. While that was drying we moved on to floral painting number two, and it was supposed to be wet on wet, but the sunny day tended to dry out the paper rather quickly. The results still looked beautiful. The kids really had fun with this. Some attempted only a couple flowers and other the whole bouquet. I requested they try at least two. I was happily surprised with how detailed some got, and what color other were able to attain. Note to self, spend more money on quality watercolors. I bought some that I thought would last for a few weeks, but these doosies I bought only ended up making it through the three days barely. Thank goodness we had some better backups, my own beautiful kit I hoard, and some others that really helped round it out, and the children didn't at all mind sharing. Who can't love that?


What's a trip to the fair without coming home with a blue ribbon? We couldn't let that happen to our little contenders. The only catch is they had to make their own. So we had them each make their own crepe paper blue ribbon that we glued magnets to the back of. This one below was one of my favorites I suppose I might be a little biased, but I love the saying.

Next up, and most important project of the day was the apple pie in a jar! The kids couldn't wait for this one. Some were disappointed when they couldn't eat the pie dough and apples right away though. I told them they wouldn't be disappointed after it was baked in the oven. Yummy goodness. I pre-sliced and peeled all of the apples, but demonstrated with one more on how to peel and cut up an apple for pies. They got the chance to add sugar and cinnamon to the mixture and stir it. I then rolled out the pie dough, and each child was able to cut out a round for the bottom of their pie and place it in their jar. We then sent around the apple filling and they scooped up a cup of filling into their jar. I then rolled out the pie dough, and cut it into strips for the top lattice, and gave the kids each 6 strips to weave on top. They all did a fantastic job, and the pies turned out beautifully.

Lastly for the day we made bean bags for our bean bag toss game. Since the pie demonstration went a little longer than expected we had to rush through this project so we could get to the game, and all the kids could go home with their own bean bags, but we finished. Whew! They picked out fabric with solid backs and patterned fronts. They then went on to stamping their initials on the solid side so we wouldn't get the bean bags confused. Sewed up three sides and then the children filled their bags with a mix of beans, peas, and barley. Finally sewing up the closure, and done. We set up three buckets in the backyard put points on each bucket, and then the kids took turns throwing their bean bags into the buckets. It is actually really fun, and there was bean bags flying literally everywhere. They landed in the trees and on the roof (?) go figure. We sent each kid home with a folder filled with printouts of coloring sheets, mazes, dot to dot and word finds all based on the county fair, as well as, some little prizes from the bean bag toss game. All in all it was a super fun week filled with yummie treats and fun projects!